A closer look at the details – image magnification methods in X-AQS X-ray software
Digital X-rays offer several advantages over analogue X-rays, including greater efficiency, lower radiation doses and improved image quality. X-ray images can be digitally processed, enlarged and measured directly on a computer. Image magnification is particularly useful for identifying even the finest structures within an image.
Our X-ray software, X-AQS, offers several ways to magnify an image, each suited to different applications.
In this article, we will distinguish between the main image magnification methods and explain how they are used in X-AQS. This will help you achieve the best possible image display for your diagnostic work. The zoom types described below, as well as their implementation, apply to both the X-AQS software for human medicine and the veterinary medicine version.
100 % zoom
At 100% zoom, each image pixel corresponds to exactly one pixel on the monitor. This provides the most accurate display for diagnostic assessment, as no interpolation of the pixel data is applied. Higher zoom levels, such as 200% or 400%, can also be used when required. However, zoom levels that are not multiples of 100% – for example, 175% or 220% – involve interpolation and can therefore affect the way image details are displayed. For diagnostic purposes, these intermediate zoom levels should be avoided.
How to apply the 100% zoom in X-AQS
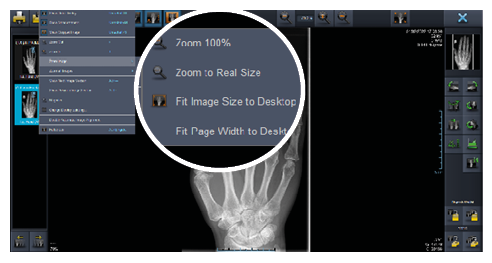
To apply 100% zoom in X-AQS, click the View tab and select Zoom to 100% under Zoom image. Alternatively, you can use the keyboard shortcut Ctrl + H or click the magnifying glass icon in the toolbar at the top of the screen. To apply the same zoom level to all currently open images, go to View and select Zoom all images, or press Ctrl + Shift + H.
The 1:1 image
In X-ray imaging, the projected image is generally larger than the actual object due to geometric magnification. The magnification factor depends on the distance between the object and the detector, as well as the distance between the X-ray focal spot and the detector. In a 1:1 image, the displayed size of the X-ray image corresponds to the actual size of the object in the projection plane. This allows structures to be displayed at their true physical size on the monitor. To use this feature, the relationship between the physical dimensions of the monitor display and the detector must first be calibrated. This calibration only needs to be performed once. To do this, select Set monitor pixel resolution under Tools. A box containing a reference line will appear. Place a ruler directly on the monitor and measure the length of the line displayed on the screen. If necessary, you can reduce the length of the line using the slider. Enter the measured value in the corresponding field and click OK. The monitor is now calibrated, and the 1:1 display can be used.
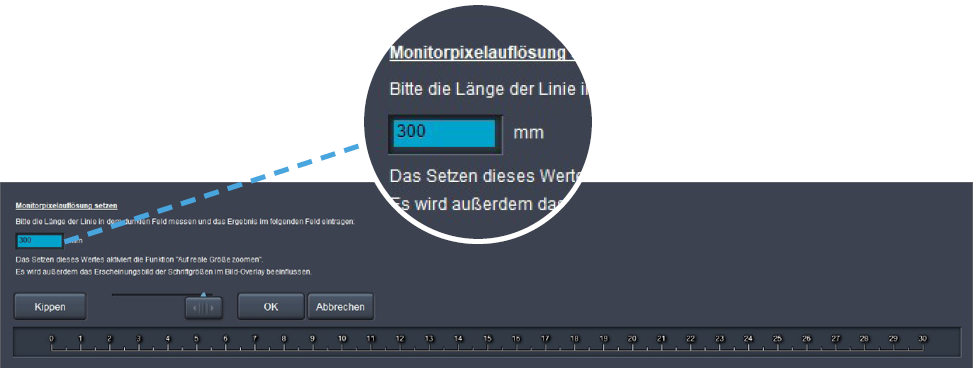
Displaying the 1:1 view in X-AQS
To display an image at 1:1 scale in X-AQS, click the View tab and select Zoom to actual size under Zoom image. Alternatively, you can use the keyboard shortcut Ctrl + R. To apply the 1:1 zoom level to all currently open images, go to the View tab and select Zoom all images, or press Ctrl + Shift + H.
Reference distance measurement
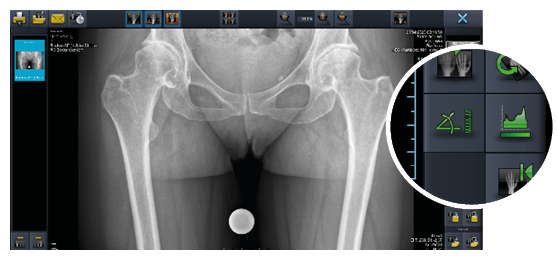
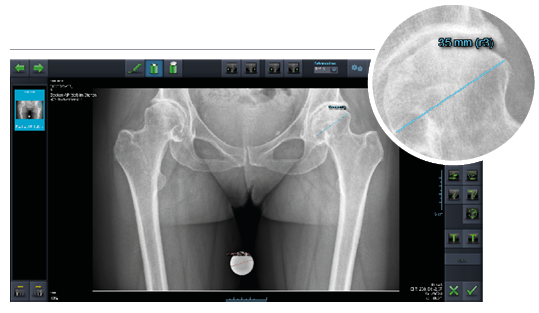
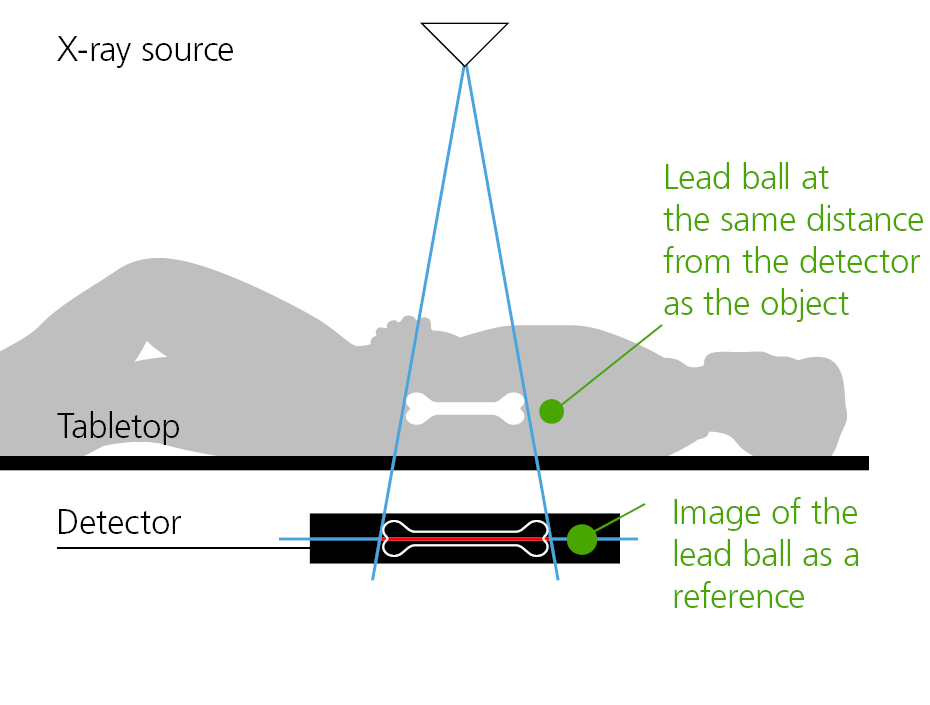
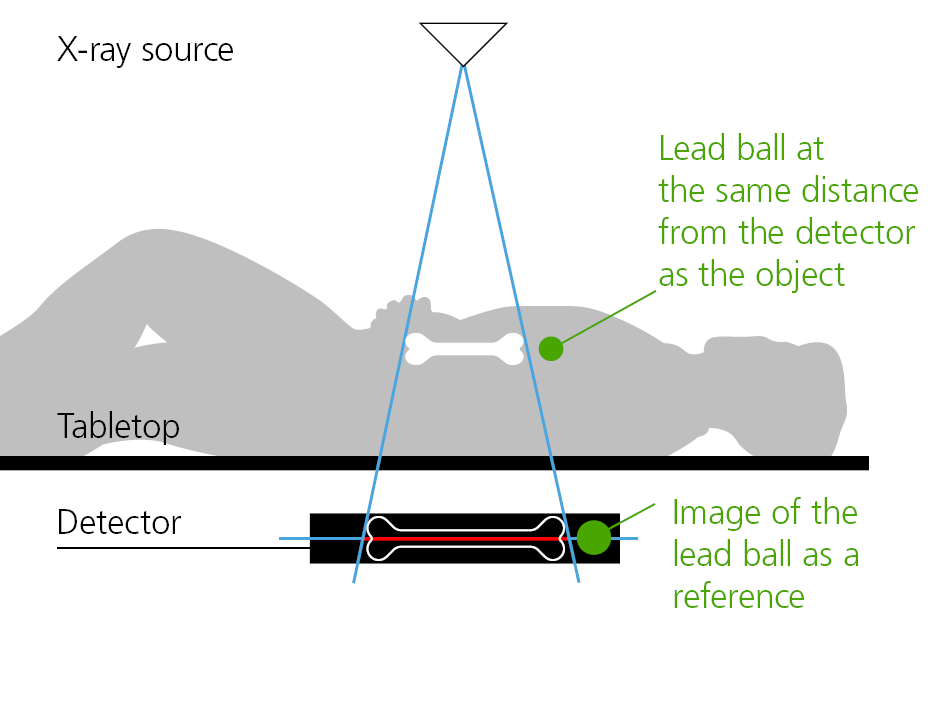
Unlike 1:1 imaging, where the object size is measured in the projection plane, reference distance measurement is used to determine the actual size of an object in the object plane. The magnification factor depends on the distance between the object and the detector: the closer the object is to the detector, the lower the magnification. Conversely, the greater the distance between the object and the detector, the greater the magnification.
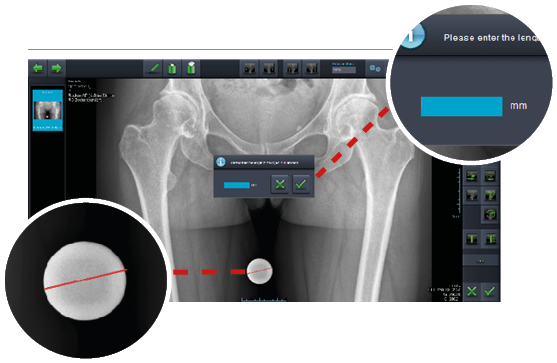
To determine the magnification factor, a reference object of known size is required, such as a lead ball. The reference object is X-rayed together with the patient and must be positioned in the same plane as the object to be measured. For example, when examining the spine, the lead ball must be placed at the same distance from the detector as the spine itself. This allows the software to determine the magnification factor and calculate the actual size of the object being measured.
Performing the reference distance measurement in X-AQS
To perform a reference distance measurement in X-AQS, click Start Measurement Editor in the right-hand panel. Then select Set Reference Distance. You can then enter the diameter of the lead ball as the reference distance. X-AQS uses this value to determine the magnification factor and calculate the actual size of the object being measured.